Overview
This exercise will walk you through the steps to creating your Visual Studio Team Services (VSTS) project.
-
Login to the virtual machine.
-
Start the Firefox or Chrome browser.
-
Login to your Team Services account -
https://{your account name}.visualstudio.com. If you do not have a VSTS account, you can sign up one for free from here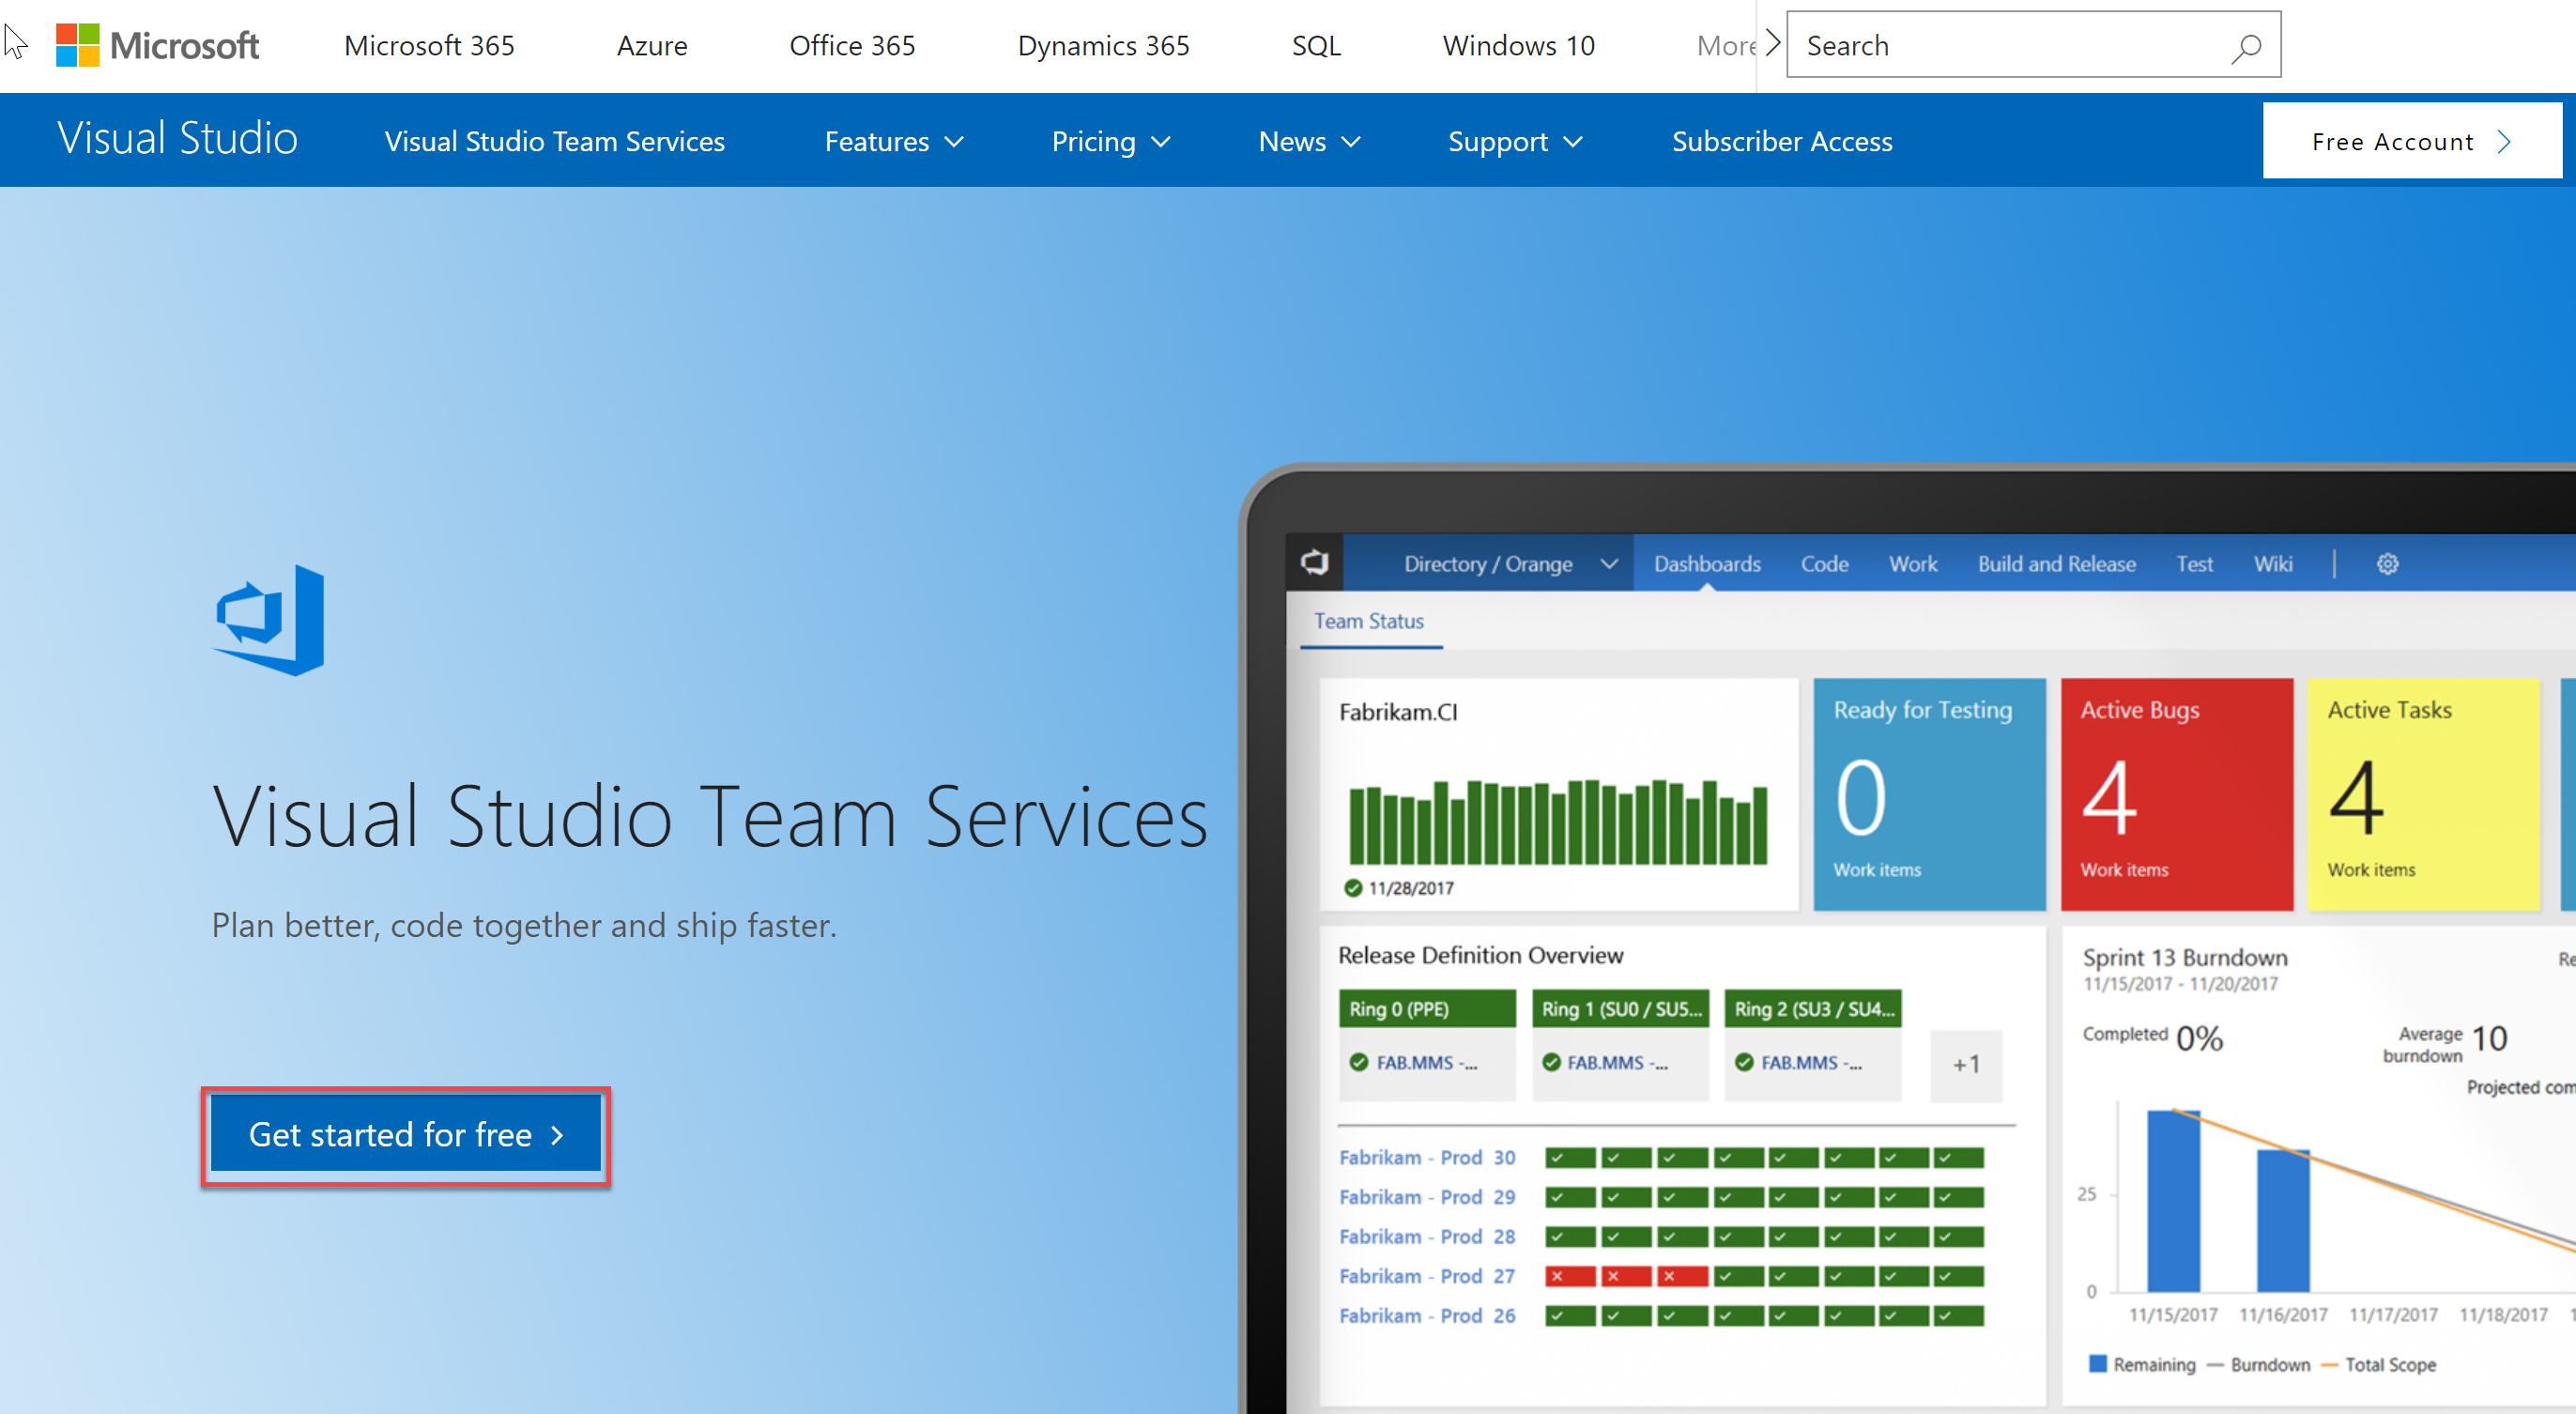
Creating a new account is usually quick and can take as little as a few seconds to complete.
Generating a VSTS Personal Access Token (PAT)
In this task you will generate a Personal access token for yourself. PATs essentially are alternate passwords. You need them to integrate VSTS with non-Microsoft tools such as Git, XCode, etc. You will need PAT to provision your project using the demo generator or to connect a private agent to your VSTS account.
-
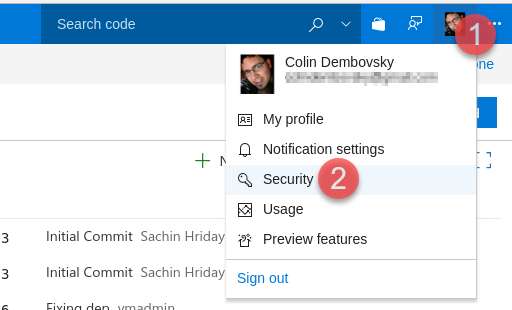
On your VSTS page, in the upper right, click on your profile image and click Security.
-
On the Personal access tokens page, click Add. Enter “java” (or whatever you want) for the Description. Scroll to the bottom of the page and click Create token.
-
When the token is created, make a note of it as it cannot be viewed again. Copy it from the browser into the clipboard.
-
Click on the Visual Studio Code icon in the toolbar to open Visual Studio Code.

-
Press Ctrl-N (or use File -> New File) to create a new file. Paste in your PAT. Save this file (File -> Save or Ctrl-S) to
/home/vmadmin/pat.txt.
Creating your project
Next, you need to create a team project. You can create the team project manually or by using VSTS Demo Generator, a tool that helps you create team projects on your VSTS account with sample content that include source code, work items, iterations, service endpoints, build and release definitions based on the template you choose during the configuration.
Provisioning a project using the VSTS Demo Generator
-
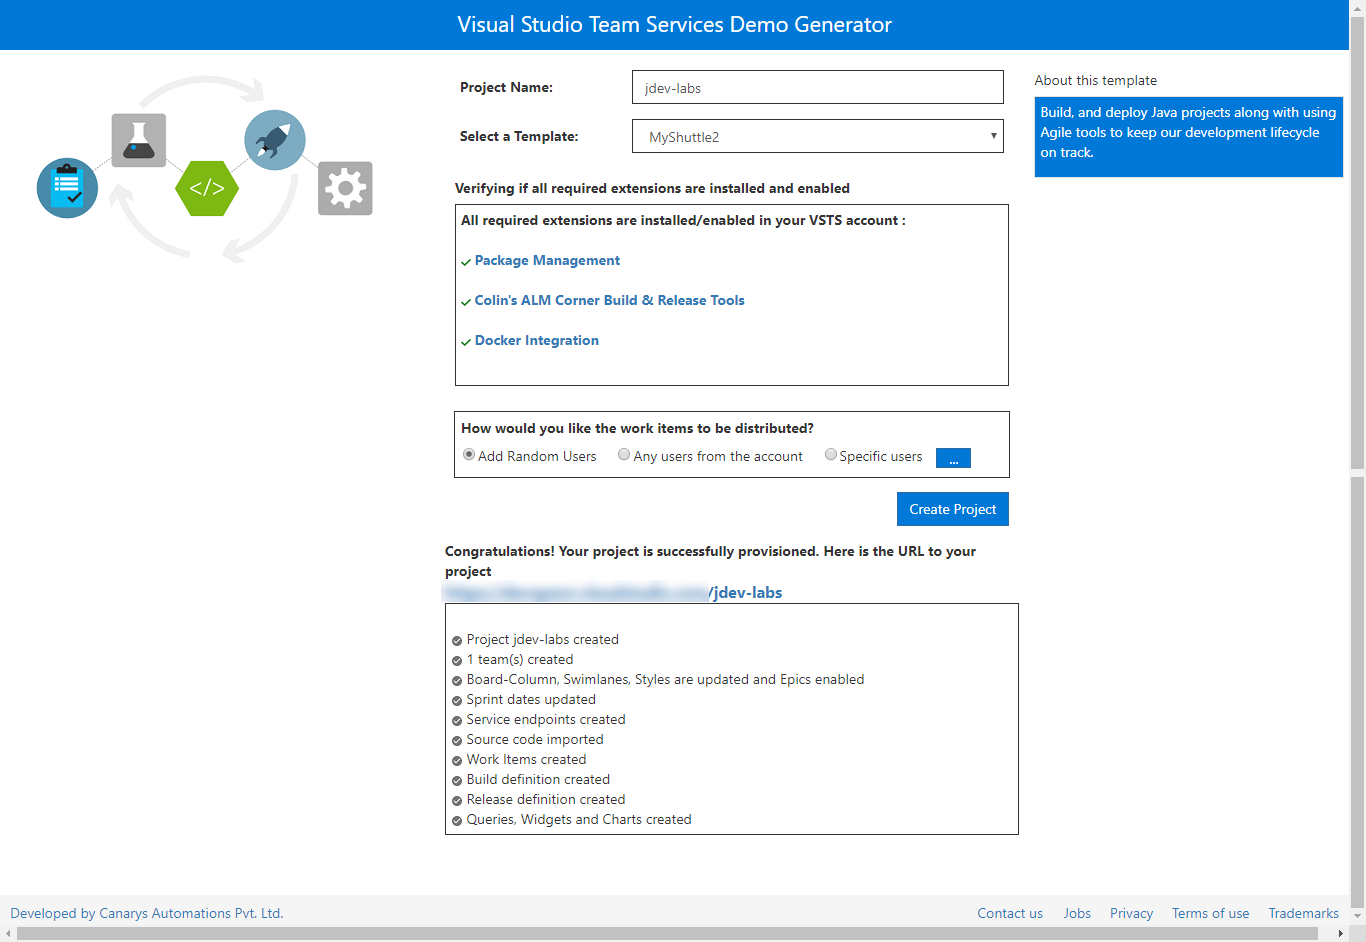
Open VSTS Demo Generator
-
Enter your account name and the PAT you saved earlier. Click Verify and Continue

-
Use MyShuttle2 for the template. Provide a Project Name (jdev-labs in this lab) and select Create Project.
-
After the project is provisioned, click the URL to navigate to the project.
Creating a project manually
If you have not provisioned the team project using the VSTS demo generator in the previous exercise, you can follow the steps in this exercise to manually create a team project and import code from a GitHub repository.
-
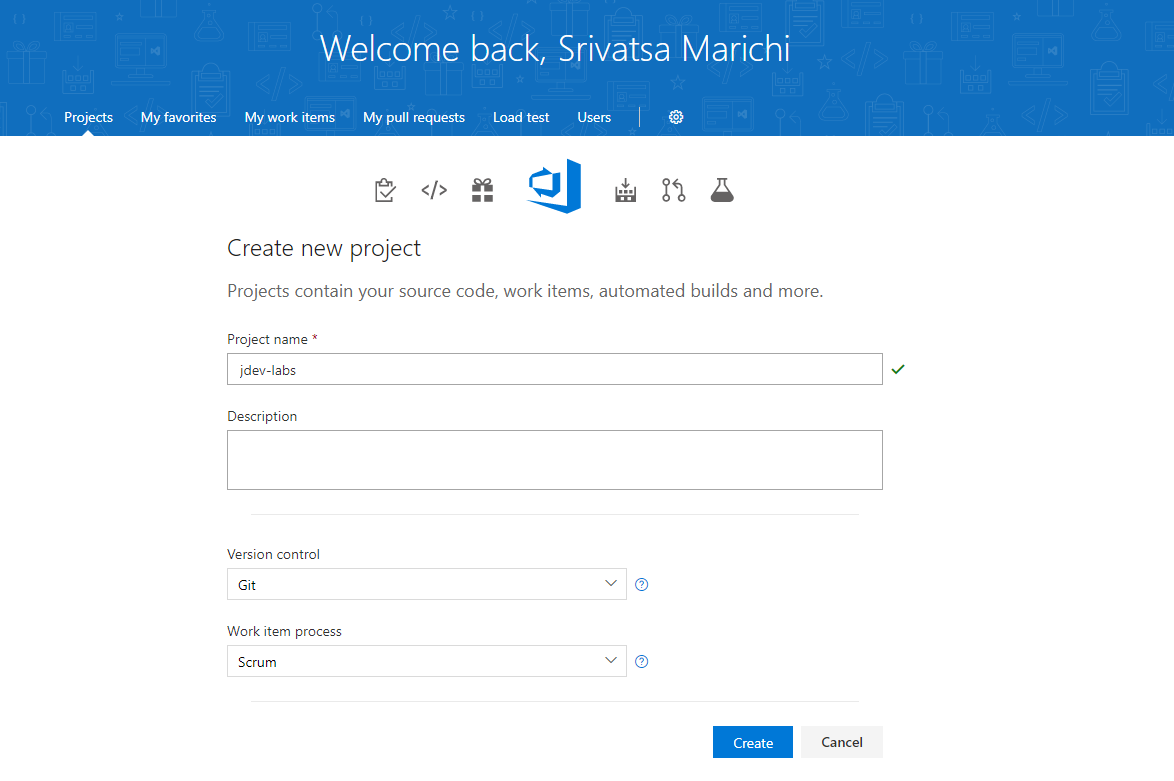
From the start page. Select New Project.
-
Provide a Project Name (jdev-labs in this lab). Select Scrum for the Work item process and click Create.
-
Click on the
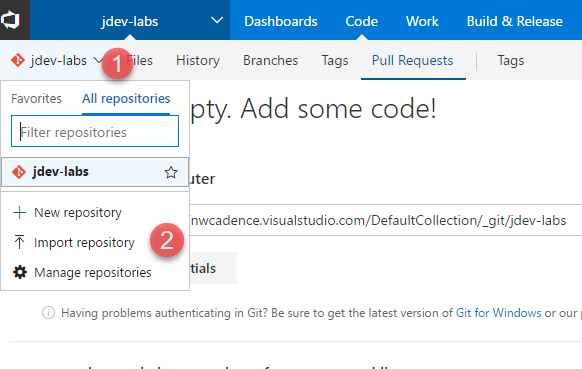
jdev-labsteam project to navigate to it. Click Code to navigate to the Code Hub. -
Click on the repo drop-down in the upper left (in the grey toolbar) and select Import repository.
-
Enter the following url:
https://github.com/nwcadence/MyShuttle2.gitand click Import.
-
The code will be imported in few minutes.
-
You will need to import one more repository - MyShuttleCalc using the above steps. Click on the repo drop-down in the upper left (in the grey toolbar) and select New repository.
-
Enter the following url:
https://github.com/nwcadence/MyShuttleCalc.gitand click Import.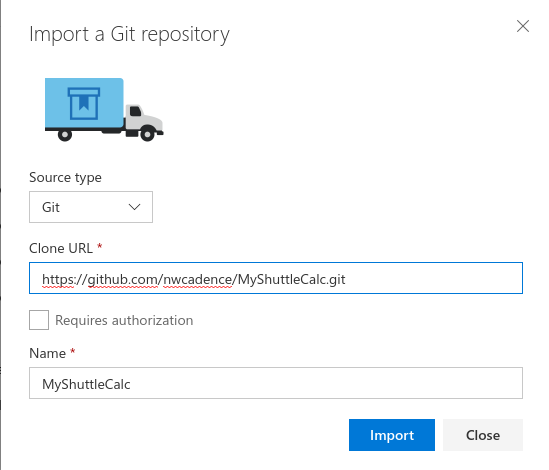
-
Wait for the import to complete.
Note: It is not necessary to clone GitHub repos into the VSTS. VSTS will work just fine with GitHub (or other Git hoster) repos. However, some linkages from source code to other aspects of the DevOps pipeline (such as work items, builds or releases) works best if the code is in VSTS
You have now created the project and ready to move to the next exercise Setting up a CI/CD private agent