Overview
LaunchDarkly is a continuous delivery platform that provides feature flags as a service and allows developers to iterate quickly and safely. LaunchDarkly gives you the power to separate feature rollout from code deployment and manage feature flags at scale. With the integration of LaunchDarkly with Azure DevOps services allow developers to release confidently with less risk. You can tie feature flag roll-outs to Azure DevOps work items to get complete control over who sees what when. By managing feature flags in the context of Azure DevOps release pipelines, unlock the true power of DevOps.
What’s covered in this lab
In this lab, you will learn
- How to implement a very simple feature flag for an ASP.NET MVC application.
- How to integrate LaunchDarkly with Azure DevOps
- How to roll-out LaunchDarkly feature flags in Azure DevOps release pipelines
Before you begin
- Refer the Getting Started page before you begin following the exercises.
-
LaunchDarkly account: You will need a LaunchDarkly account. If you don’t have one sign up for a trial account here.
-
Visual Studio 2017 version 15.4 or later with .Net Core SDK installed.
-
Use the Azure DevOps Demo Generator to provision the project on your Azure DevOps organization. This URL will automatically select LaunchDarkly template in the demo generator. If you want to try other projects, use this URL instead -https://azuredevopsdemogenerator.azurewebsites.net/
Follow the simple walkthrough to know how to use the Azure DevOps Demo Generator.
Exercise 1: Create a Feature Flag in LaunchDarkly
-
Sign in to your LaunchDarkly account. You’re then taken to the portal where you can create your first Feature Flag. Click
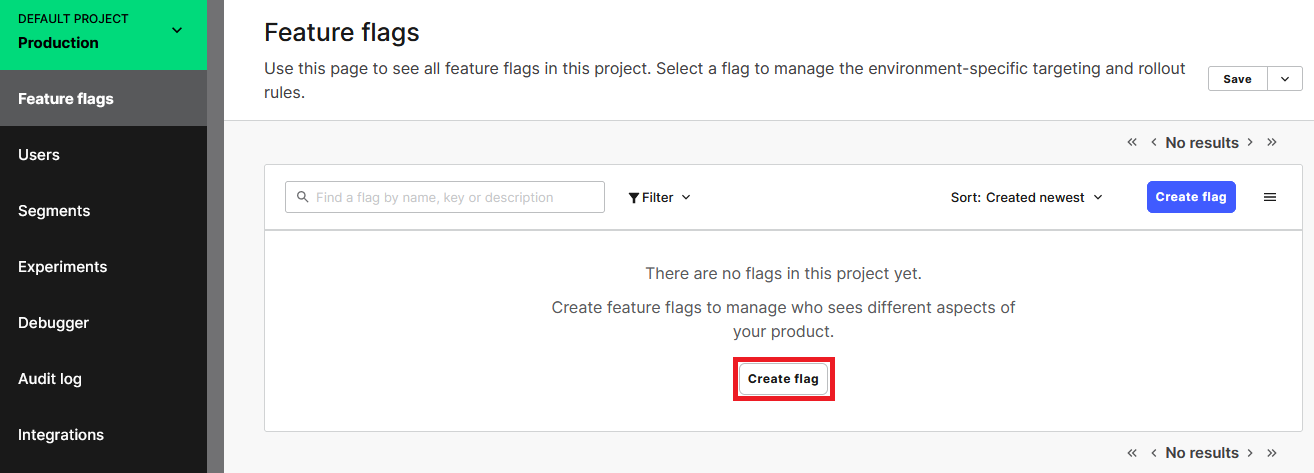
-
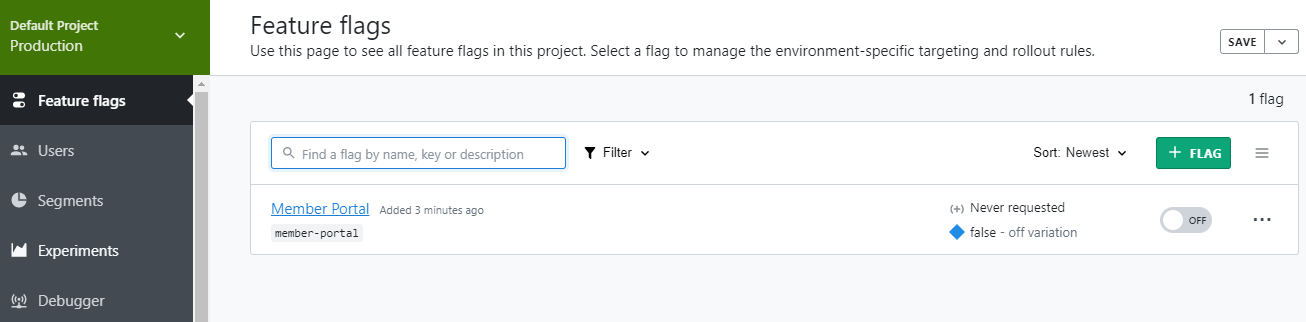
In the Create a feature flag window enter Member Portal as feature flag name and click Save Flag
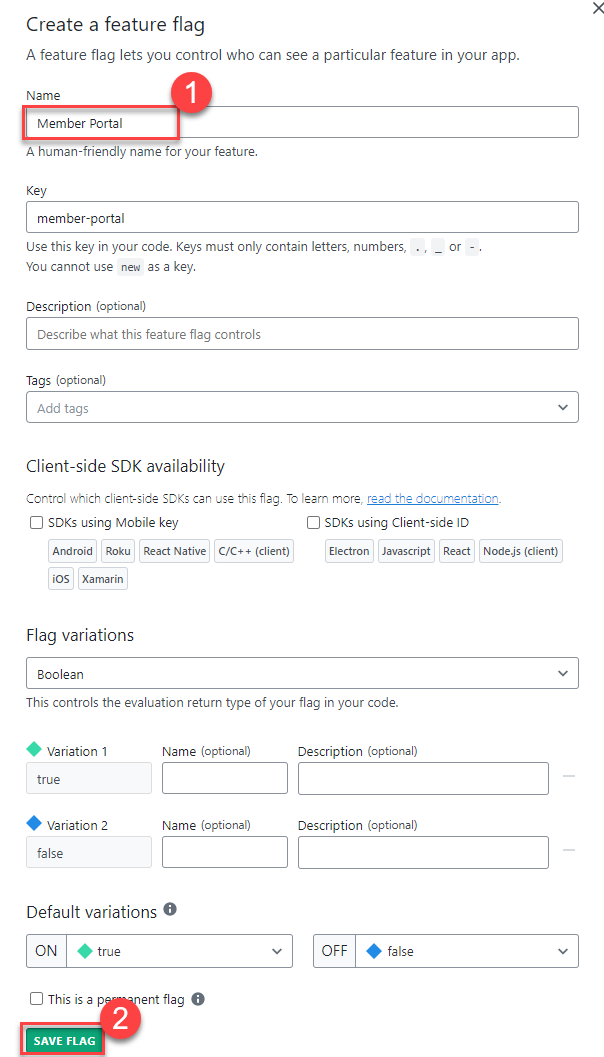
-
You’ve created a flag named Member Portal. Assume that you want to use this flag to determine the visibility of the Member Portal feature in your ASP.NET MVC web app. Now your dashboard looks as below
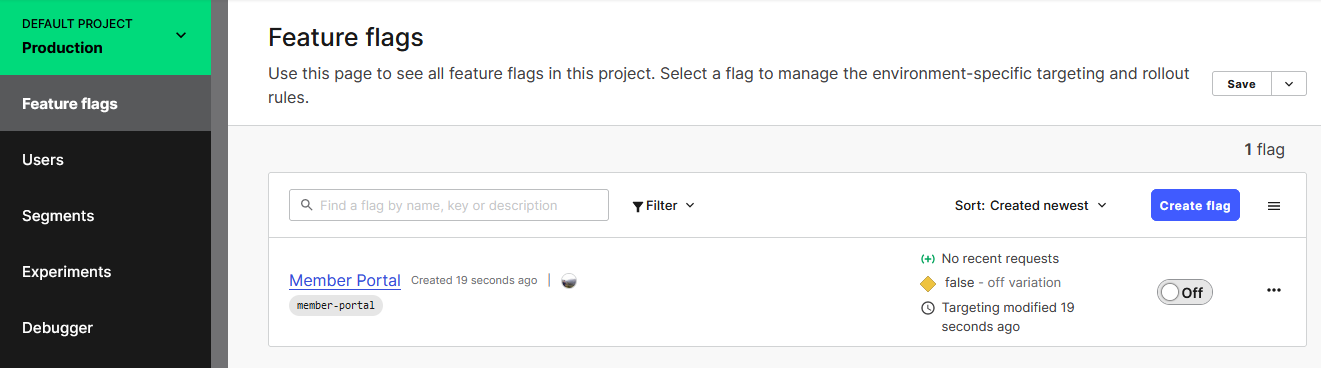
-
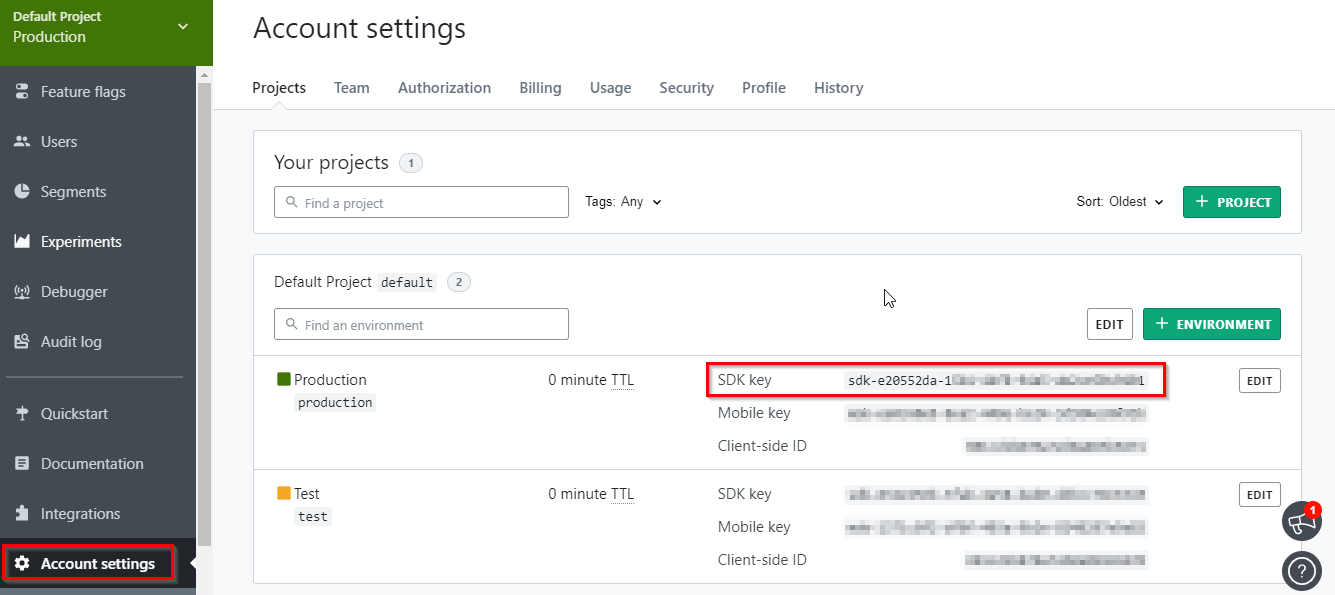
To integrate LaunchDarkly into your application, you need an SDK key. If you go the Account settings in the portal, and navigate to Projects you see that there are two predefined environments: production and test. You can use the production environment SDK key for this project. Copy SDK key and paste it into your notepad. You need this in the following exercise.
Exercise 2: Integrate LaunchDarkly in your Web application
-
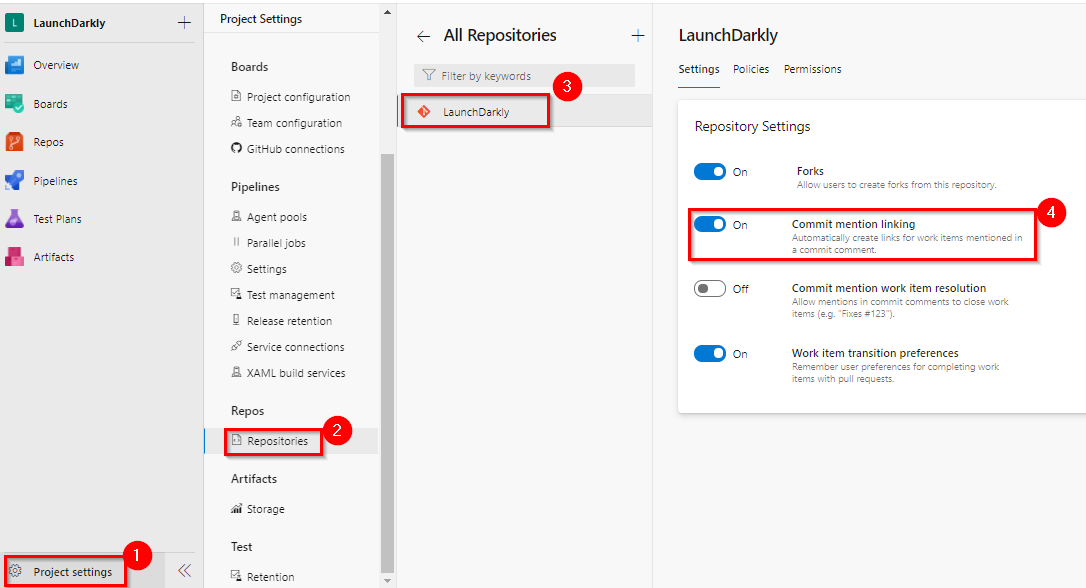
Make sure Commit mention linking toggle is On in your Azure DevOps services project as shown below. This will automatically create links for work items mentioned in a commit comment.
-
Navigate to Boards | Work items. Select User Story with the title
Implement FeatureFlag Management using LaunchDarklyand assign it to yourself if its not assigned.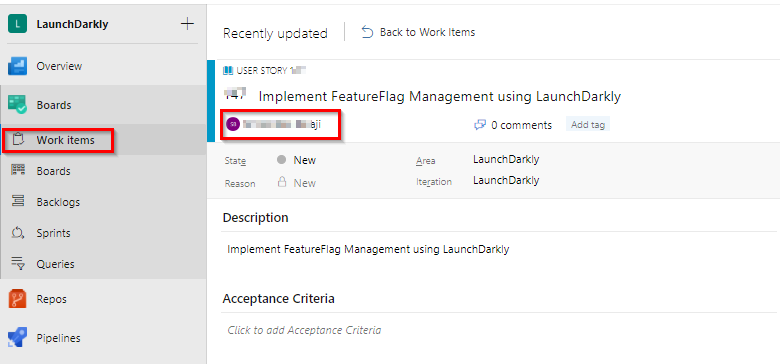
-
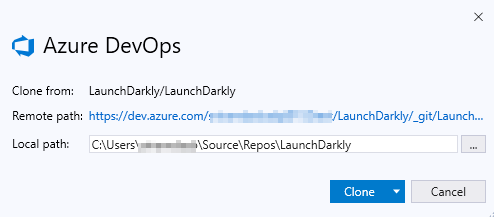
Now navigate to the Repos within the project portal, select Clone and then select Clone in Visual Studio.
-
When the code opens in Visual Studio if you are prompted to sign into Azure DevOps Services, use the same credentials (that you used above to create the azure devops project), choose the local path to clone the repo and select Clone.
-
In Team Explorer select Branches and right click launch-darkly branch and select checkout. Select PartsUnlimited.sln to open the project.
-
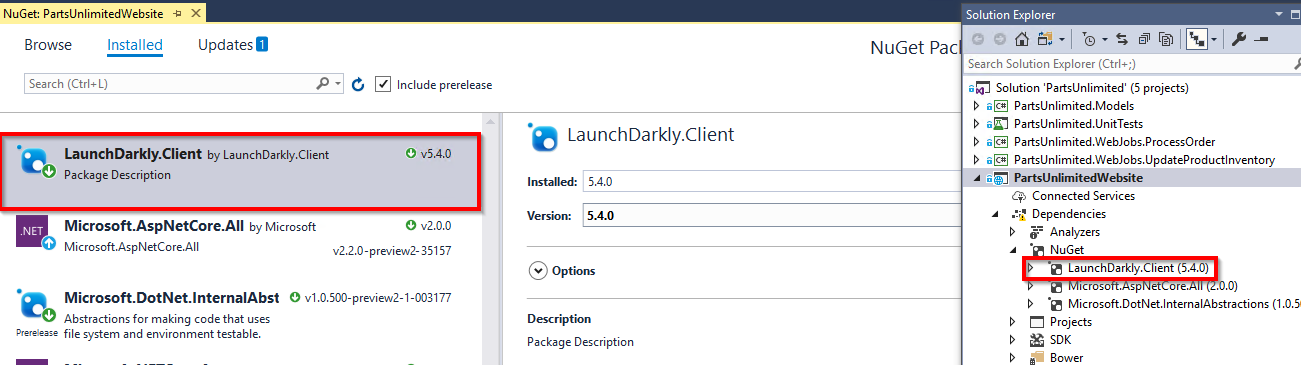
To integrate LaunchDarkly with .NET applications you need to install NuGet package with the LaunchDarkly client. In the current project, we have already added for ease of use.
-
Launch the application locally once. You would be able to see Member Portal on the right side corner of the application.


Assume that this Member Portal module is a new feature and you would like to control this feature using LaunchDarkly Feature flag so that when you turn on the flag in LaunchDarkly then only this feature should be visible to users else not.
-
Open HomeController.cs from the path \PartsUnlimitedWebsite\Controllers and replace the code from following code snippet.
-
Open AccountController.cs from the path \PartsUnlimitedWebsite\Controllers and replace the code from following code snippet.
-
Open _Layout.chtml from the path PartsUnlimitedWebsite\Views\Shared and replace line 55 ` @await Html.PartialAsync(“_Login”)` with the below code.
` @if (ViewBag.togglevalue == true) { @await Html.PartialAsync(“_Login”) } `
-
In Home Controller.cs and AccountController.cs replace __YourLaunchDarklySDKKey__ with your LaunchDarkly account SDK key which you have copied in previous exercise. This is to create a new LDClient with your environment-specific SDK key:
` static LdClient client = new LdClient(“YourLaunchDarklySDKKey”);`
 Note: So what did we do? The HomeController starts with initializing a static LaunchDarkly client. And the methods to view MemberPortal are modified to check the Feature flag toggle in LaunchDarkly is On or Off. Finally, the _Layout.cshtml page checks the toggle value and renders the MemberPortal link if the flag is turned on.
 - In HomeController.cs if you go through code from line 57 to 74
//LaunchDarkly start
      User user = LaunchDarkly.Client.User.WithKey("[email protected]");

      bool value = client.BoolVariation("member-portal", user, false);
      if (value)
      {
          ViewBag.Message = "Your application description page.";
          ViewData["togglevalue"] = value;
          return View(viewModel);
      }
      else
      {
          return View(viewModel);
      }
     // return View(viewModel);

  }
  //LaunchDarkly End
When you request a feature flag, you need to pass in a user object. So we are initializing user object in the beginning. This will be used to check whether a user with specified key exists in LaunchDarkly or not. In this sample, we have hardcoded the user value. In real time it might be from logged in user, database etc..
Then we are calling the BoolVariation method to check feature flag value in LaunchDarkly. If the flag is true it will set [ViewData[“togglevalue”] to true which is used in _Layout.chtml to view Member Portal module. If it is false it won’t show Member Portal Module.
Similarly in AccountController.cs we have added LaunchDarkly code to Login() method which is responsible to show Login page once you click on Member portal icon. If the flag in LaunchDarkly is false an HttpNotFound error will be returned for the Login page.
-
Now Save all the changes and launch the application locally. Since the MemberPortal flag which we created is turned off we would not be able to see Member portal link as below.

So we have implemented feature flag control using LaunchDarkly. Though you can enable the toggle from the LaunchDarkly portal manually in this lab, we will try to Turn the feature flag on in Azure DevOps Release pipeline using the LaunchDarkly extension. To include feature flags as part of the release process we need to associate this changes with the Azure DevOps work item to get complete control.
-
Note down the Work item id which is assigned to you as shown below. (in my case it is 2051 )
-
Now navigate to Changes tab in Team Explorer and enter comment suffixed with work item id with hash tag (ex: integrated LaunchDarkly #2051) and select Commit All and Push to push all the changes to the Repo.
Exercise 3: Automatically rollout your LaunchDarkly feature flags during release.
-
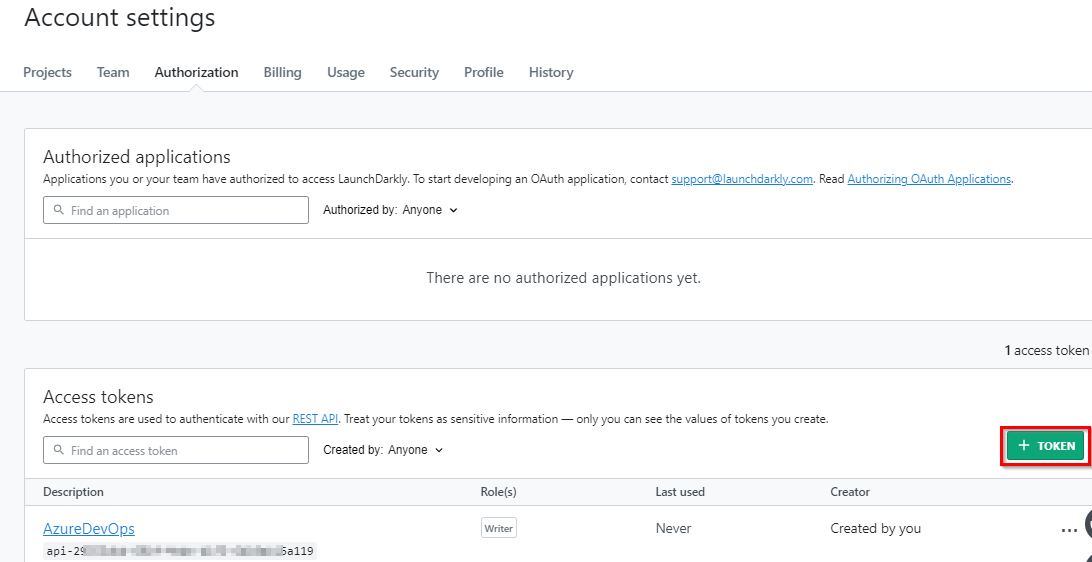
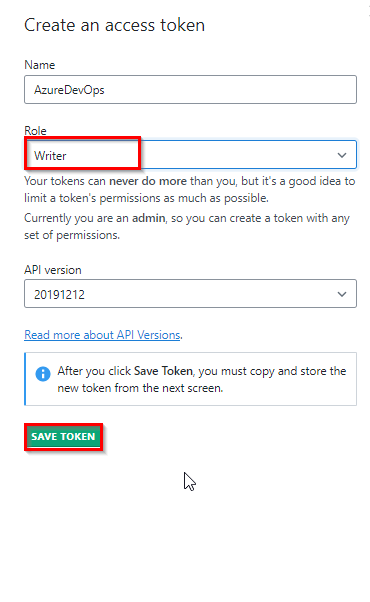
We need a LaunchDarkly access token to integrate with Azure DevOps services. Visit the Access Tokens tab on the Account Settings page in LaunchDarkly. If you don’t have, create one and copy access token to the clipboard. Make sure the token has at least Write access
-
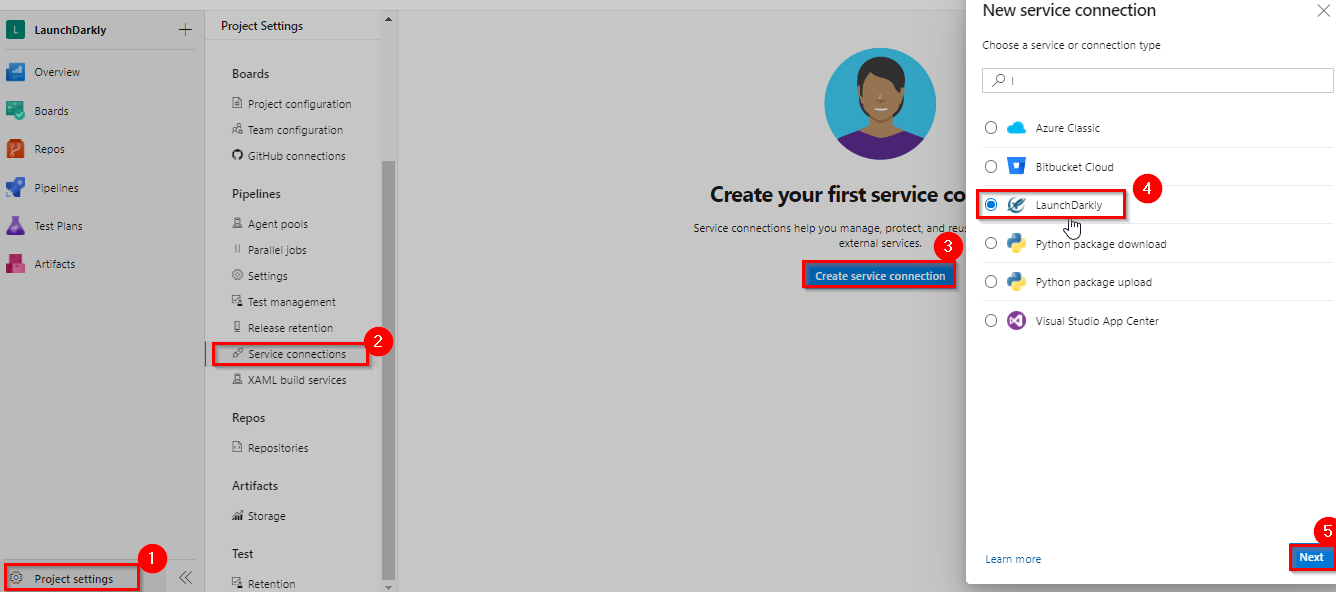
In Azure DevOps project navigate to Project Settings | Pipelines | Service connections. Select Create service connection , choose LaunchDarkly and click Next.
-
In New LaunchDarkly service connection window give connection name and paste the access token which you copied in the first step and click Save

-
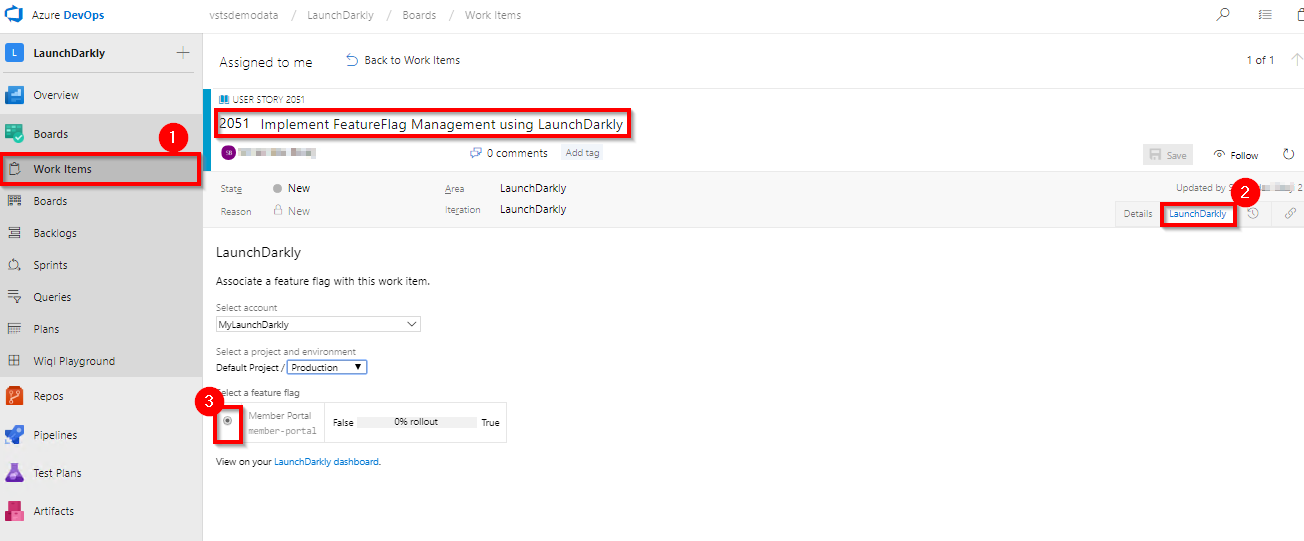
Open the work item assigned to you and select the radio button beside your MemberPortal feature flag under LaunchDarkly tab and save changes.
-
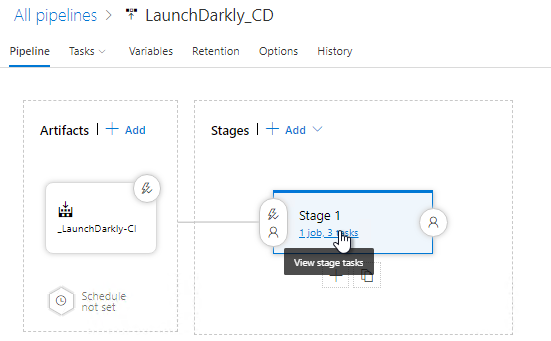
Navigate to Releases under Pipelines. Select LaunchDarkly_CD pipeline and click Edit.

-
Select Stage 1 to view the tasks in the pipeline.
-
You would see three tasks as shown below
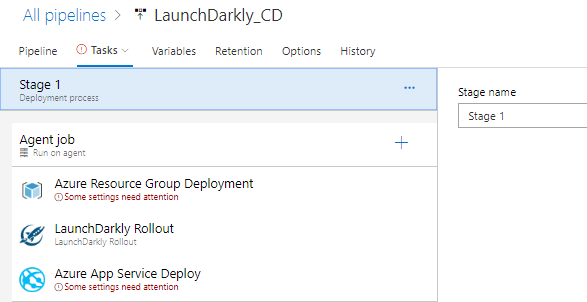
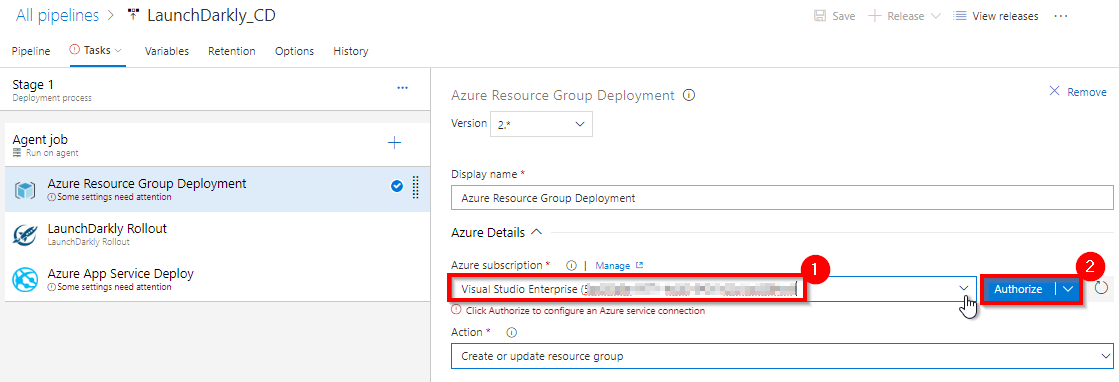
Azure Resource Group Deployment: This task helps you to deploy an Azure app service for your PartsUnlimited website using ARM template.
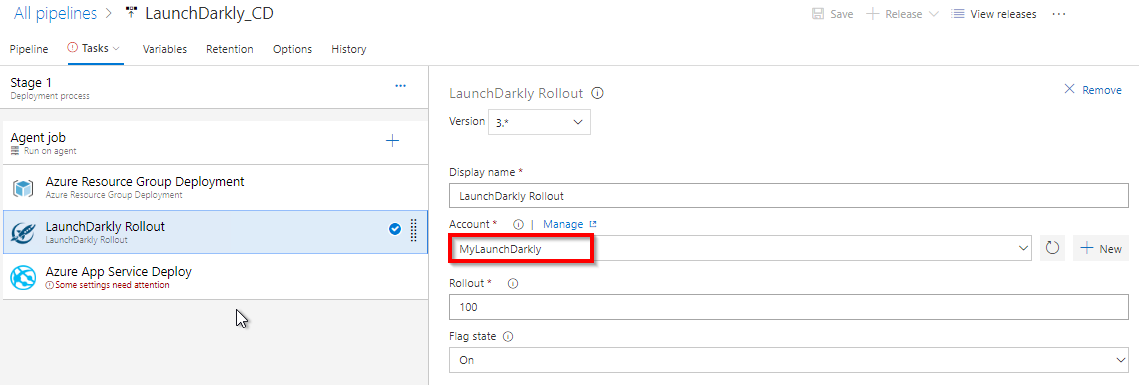
LaunchDarkly Rollout: This task helps to rollout/ turn on the feature flag in your LaunchDarkly subscription
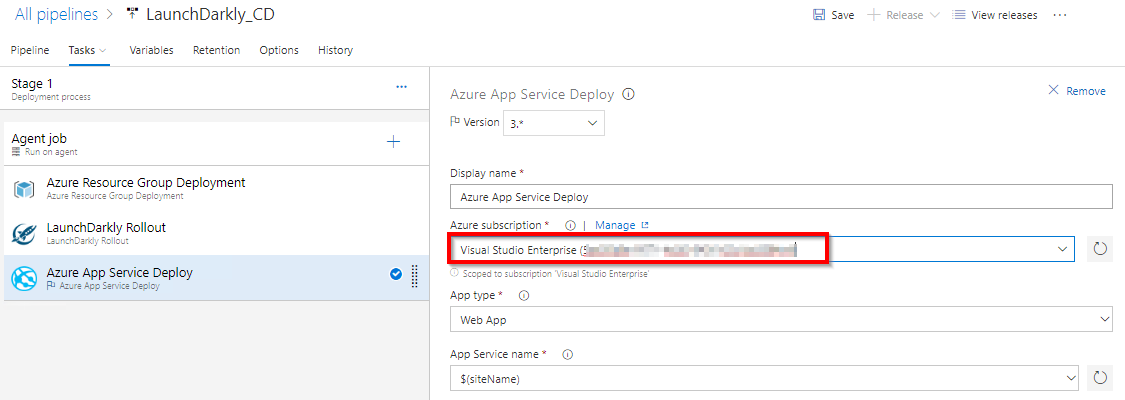
Azure App Service Deploy: This task deploys the PartsUnlimited web app to the app service created in the first task.
-
Select Azure Resource Group Deployment task and choose your Azure subscription. Then click Authorize to configure Azure service connection.
-
Select LaunchDarkly task and choose your LaunchDarkly service connection from the Account drop down
-
Select Azure App Service Deploy task and choose your Azure subscription.
-
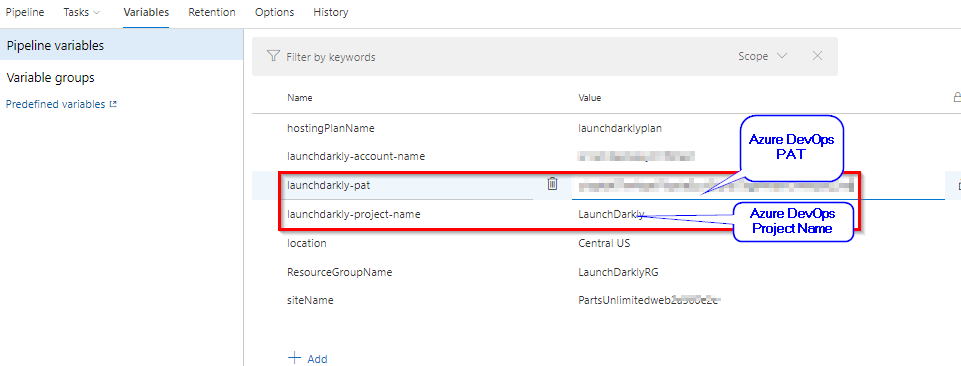
Select Variables and for launchdarkly-pat variable enter your Azure DevOps services Personal Access Token (PAT). If you don’t have one click here to know how to create personal access tokens for Azure DevOps Services. Also fill out the launchdarkly-account-name and launchdarkly-project-name variables with the name of your Azure DevOps account and the project name. Save your changes.
-
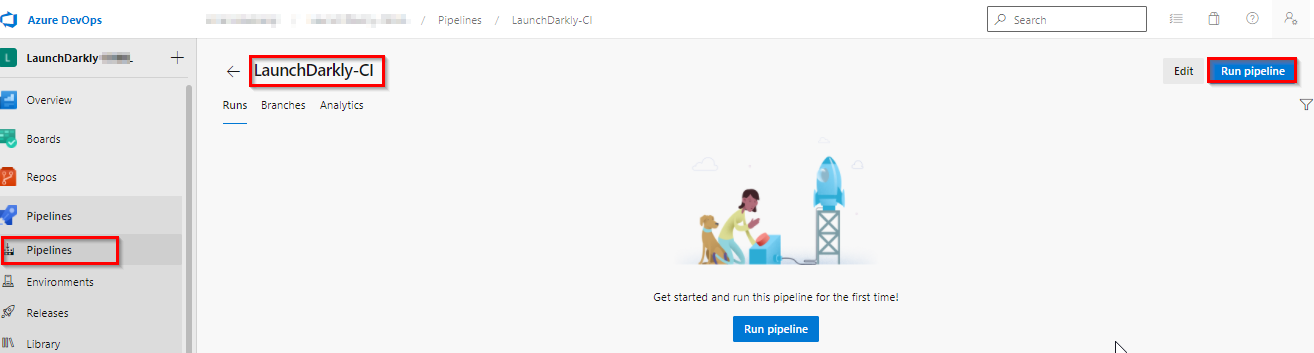
Now you are done with the configuring release pipeline. Navigate to Pipelines–>Pipelines and select LaunchDarkly-CI build. Click Run Pipeline. This CI pipeline has tasks to compile .Net Core project. For more guidance on how to build .Net Core projects with Azure Pipelines see here. Once the build completes successfully a release would be triggered to deploy app and rollout feature flag in LaunchDarkly.
 Note: We also have a YAML build pipeline if that’s something you’re interested in. To proceed through the YAML pipeline, choose LaunchDarkly-CI-YAML and click Edit. If you utilize the YAML pipeline, make sure to update the LaunchDarkly-CD release definition’s artifact link.
 -
Once the release completes successfully you would be able to see MemberPortal feature flag is turned on in LaunchDarkly dashboard.

-
Go to your Azure portal and browse the application deployed by release pipeline.
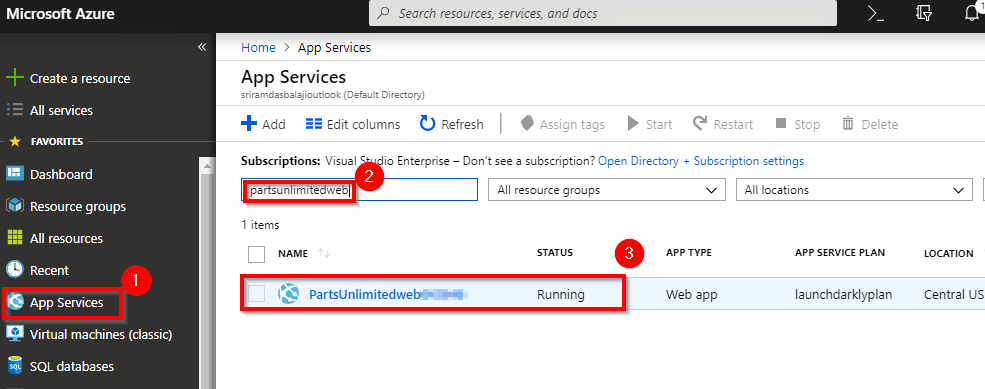
You will see that the Member Portal is enabled on your website.

And this is only the beginning. There are lot more features of LaunchDarkly.
-
User Targeting: LaunchDarkly targeting lets you turn features on or off for individual users or groups of users. You can use the Targeting tab to roll features out for internal testing, private betas, or usability tests before performing a broader rollout. You can create your own rules to target who you want, when you want. Learn more about targeting users in our documentation here.
-
Custom targeting rules: In addition to targeting individual users, LaunchDarkly allows you to target segments of users by constructing custom rules. In other words, you can create custom rules to target users based on any attributes you send us. Learn more here
-
Projects and environments to manage your development process: Projects allow you to manage multiple different software projects under one LaunchDarkly account. Environments allow you to manage your feature flags throughout your entire development lifecycle — from local development to QA, staging, and production.
Do you want to learn more about LaunchDarkly? If yes click here for LaunchDarkly documentation.
-